« Octopus and Diver Printing - part 2 | Front Page | Video in preparation - our first 'sequel'! »
Octopus and Diver Printing - part 3
Posted by Dave Bull on April 24, 2020 [Permalink]
(This is a ‘Safe for Work’ series of blog posts about the production process, not the image itself …)
Continued from Octopus and Diver Printing (2) | Starting point of the thread is here
Before we start the actual printing, let's take a look at the workspace:
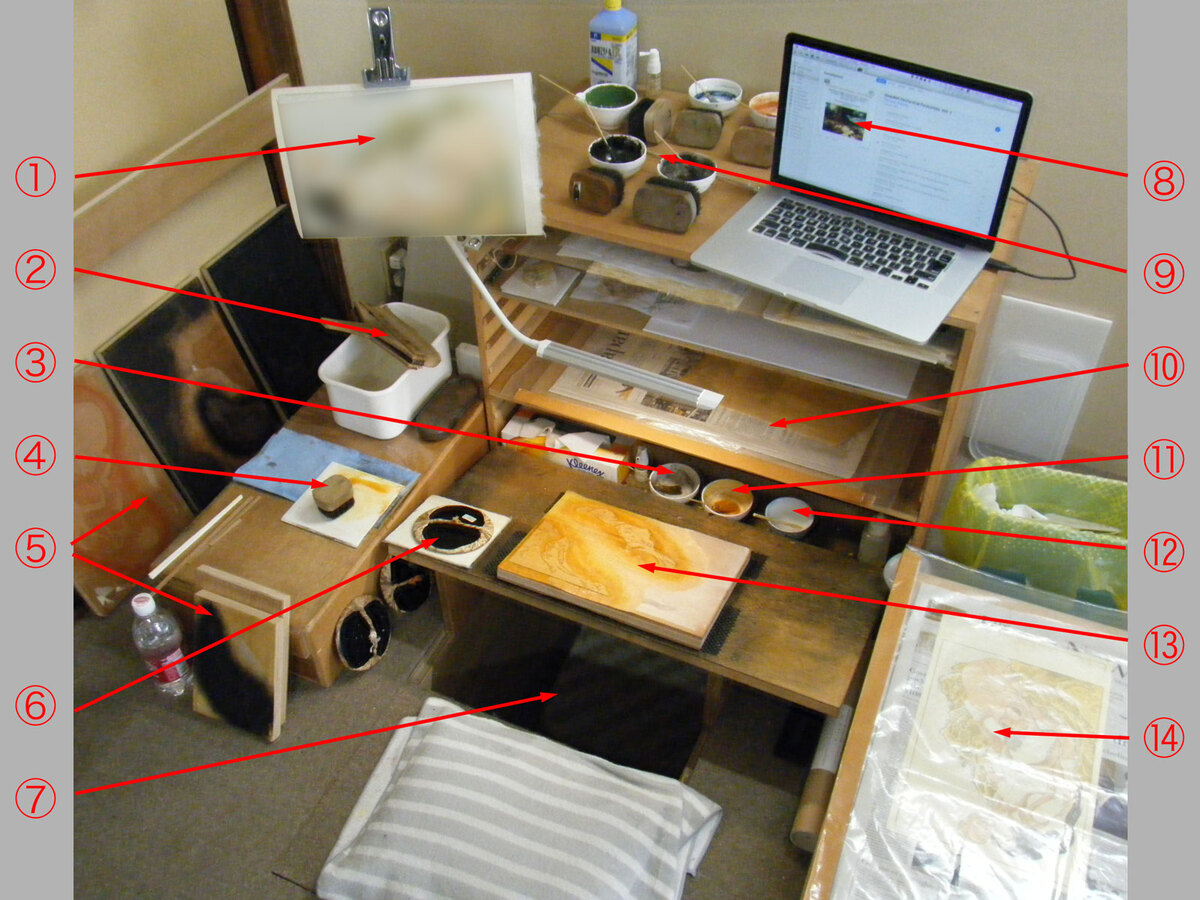
This isn't my own 'personal' workspace; this is one of the workstations upstairs over the Asakusa shop. I haven't done any 'real' printing work since we opened up this shop, but around ten years ago, on a web page with a workshop Soundscape, I showed a similar photo of the workbench in my Ome home (to which I might be returning sooner rather than later ...)
The numbers in that image:
- the sample print chosen from the previous testing to serve as a 'model' for this batch
- a water brush, resting on top of its bucket (with just around a centimetre of water inside)
- on the small shelf in front of me, another small cup with water (and a 'hakobi' applicator)
- the brush for the colour in use
- the block set for this print (carved on both sides)
- the baren in use, and a couple of others standing by
- the bench is positioned on a raised floor, leaving a space for my legs underneath
- iTunes!
- the collection of mixed pigments - and matching brushes - for this print
- the stack of paper waiting for printing (in-stack)
- a small cup with the pigment for this impression
- a small cup with paste
- the block itself
- the stack of printed paper (out-stack)
Here is a closeup. This is of course all set up ready for use by a left-handed printer - baren and brush on the left, the out-stack on the right ...
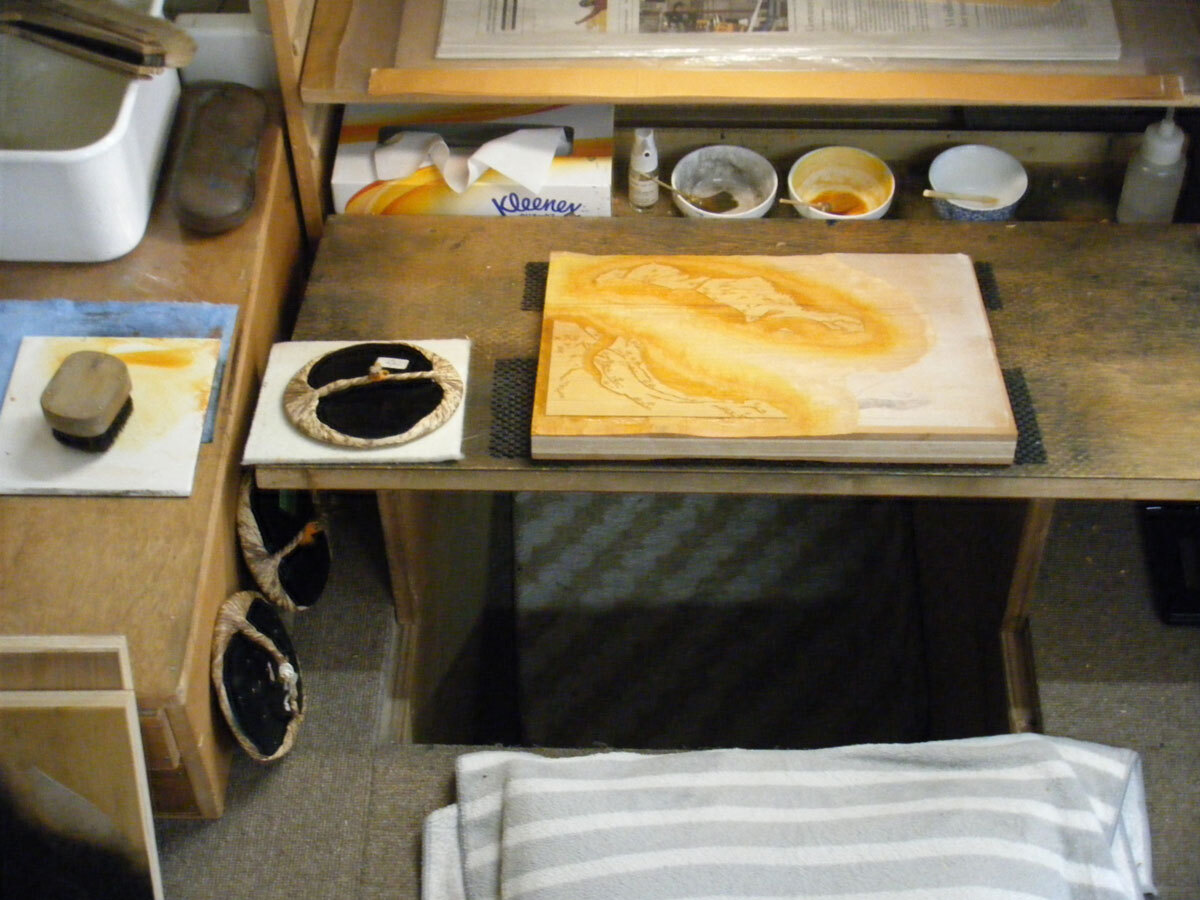
It's not so clear from that image but all of the 'active' parts of this setup - the piece I am sitting on, the printing bench itself, and the shelf holding the in-stack - are all moveable; they slide back and forth. Once I am 'down in the hole', I slide my seat forward a bit and pull the printing bench towards me over my knees, then when I am ready to begin printing, the in-stack tray also slides forward a bit, putting the paper perfectly within reach.
Looking from the side, you can see that the printing bench itself is built on an angle. This is an extremely important point - the printer's forearm ends up moving over the bench in the same orientation as the block itself, and the wrist is never bent or 'cocked' (we'll see how this works in later images ...)
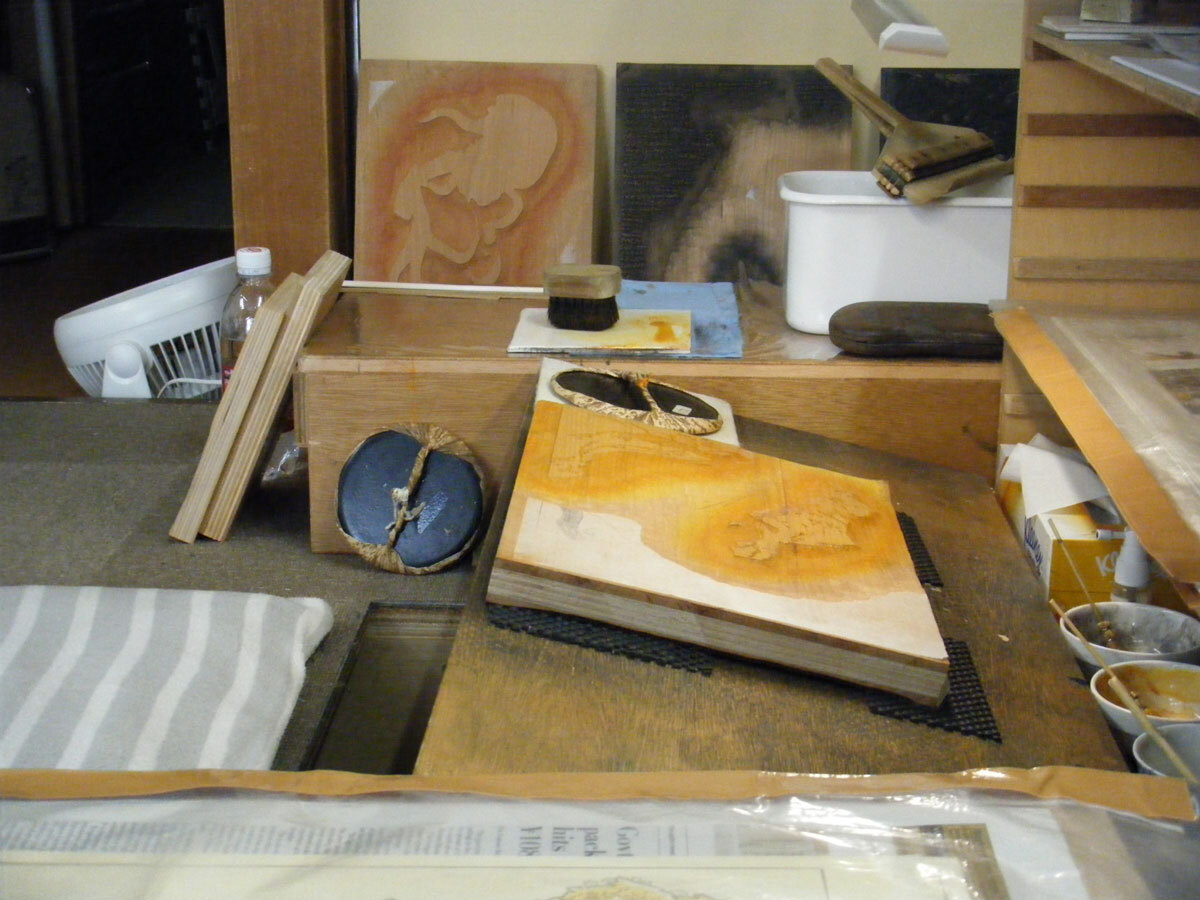
That's the basic setup ... in the next post, we'll see how the action moves along ...
This thread continues in Octopus and Diver Printing (4) | Information on getting the print is here
Added by: hume on May 11, 2020
In the future will more ero style prints be made? Can we even submit our own works for future considerations?

Added by: Paul Jones on May 19, 2020
Really enjoying this series - I hope you get a chance to continue it and I can't wait to receive my print. Stay safe.
Added by: Dave on May 19, 2020
Paul, thanks for the jog ... I've got the photos for the next one in the can ... just haven't managed to get to it yet ...
Added by: Paul Jones on May 20, 2020
Dave! It just arrived today - my God I must say it's really something special. I opened it after putting the little one down on perhaps the nicest evening of the year so far with raking light...
I've been following the streams a bit more lately (easier now it's permanent remote work) so I thought I knew what I was in for but still opening the package was a striking experience.
40 years sure do count for something :) Chapeau Sir
Add Your Input