« Love child of Bob Ross and Jim Henson ... | Front Page | Doi collaboration video - Part 5 »
Sizing machine - proof of concept?
Posted by Dave Bull on June 7, 2016 [Permalink]
A few weeks ago I made some posts on this blog outlining problems we were having with both our wood supply, and the paper supply.
As you have seen, we are on the road to working out a completely new supply of wood for ourselves (I'll be reporting more on that in a few days ...); today, I can show you something that we have been working on that might help with the paper situation.
Through comparison of our own experiences with that of other workshops, it has become clear to everybody here that the problems we are all having with the paper recently (heavy feathering, etc.) are inherent in the paper itself, and can thus be completely solved only through action by the papermakers. But during the time over the past few months when suspicion was falling mostly on the sizing, I experimented with dozens of different formulations for applying size to the paper - stronger/weaker mixtures, different ratios of glue/alum, different brushing methods, etc. etc.
Among the things I tried was an attempt one day to dip the sheets of paper into a tub of size, instead of brushing it on. The results were interesting - although I ended up with sizing that was a bit on the 'heavy' side, the application was much more even across the sheets. I didn't push the idea too much, because I found it next to impossible to hold and dip the paper without destroying it in the process (paper that wet is of course very difficult to handle).
But the other day, as I got the system for our new woodblocks up and running, I began to think about a setup for 'dip' sizing, and began to gather some materials together.
Here's a photo I showed a few days ago, while laying out the wood for cutting. Do you see the items scattered at the back of the bench?
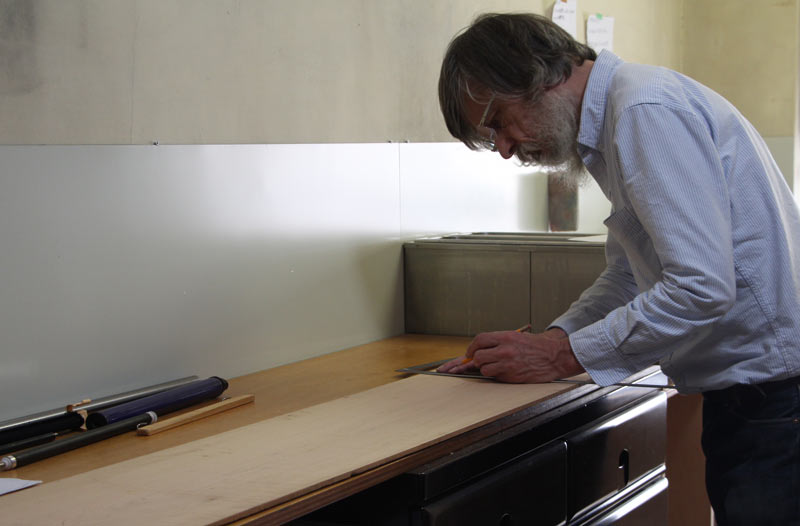
Let's take a closer look ...
I had an old Epson laser printer in the Ome workshop, one that had come to the end of its life and which had been replaced by a newer model. Luckily, the city garbage collection won't pick up those things, so it had just been stuck in the back of a closet. I hacked it apart and found a few interesting rollers inside. I also took apart the last toner cartridge we had used with it, and found more rollers in there.
Two of them seemed particularly interesting:
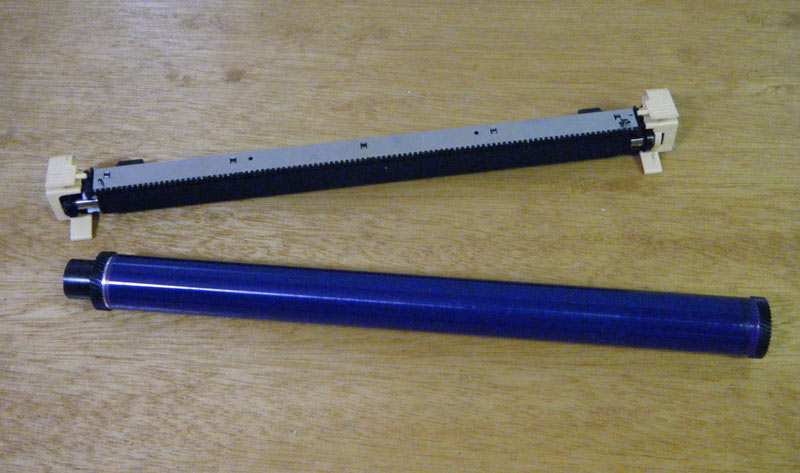
The top one there has a firm spongy texture, and is mounted on springs, while the other one has a smooth and hard surface. Although they are from different parts of the printer, there are gears that match up ... Hmm ...
So, let's give this a go! Today is Tuesday here in Tokyo, and that means I can lock the shop door and spend the entire day upstairs in the workshop playing around with this. Can I actually figure out a way to make this happen?
To start with, I prepared a 'base' piece, and cut notches and holes that matched protrusions on the sponge roller:
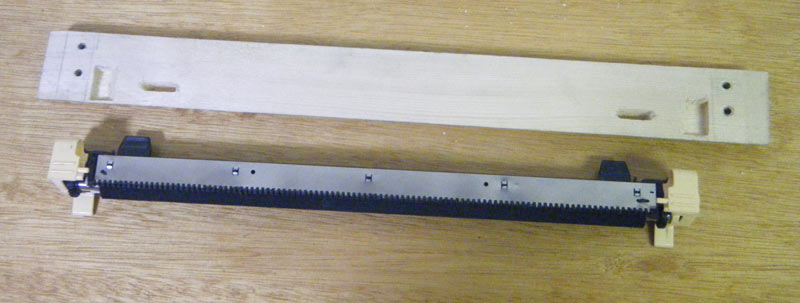
Here's the roller 'plugged in' to the base plate:
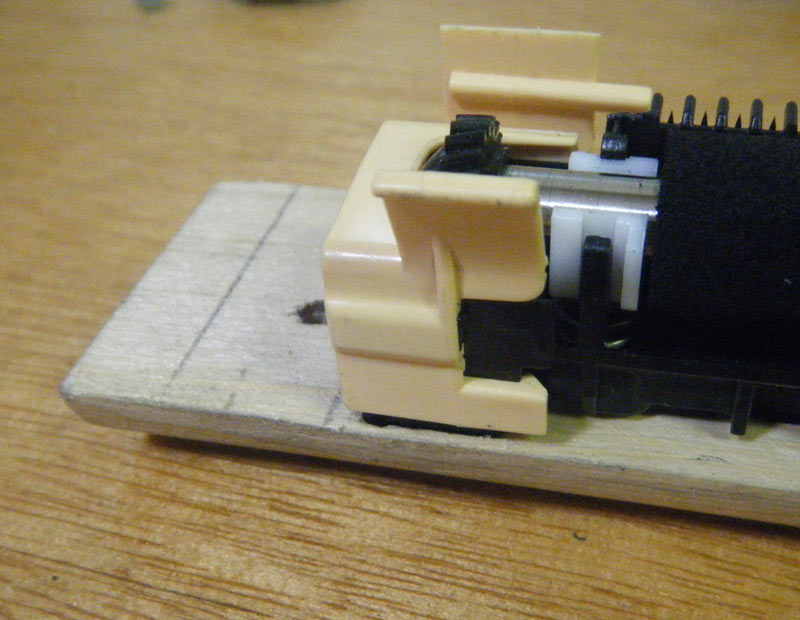
I then made two end pieces for the assembly. Here's the one at the left end, with a plastic socket (of course also scavenged from the laser printer) that is ready to receive the blue roller:
href="https://mokuhankan.com/conversations/images/2016_06/sizing_machine_05.jpg">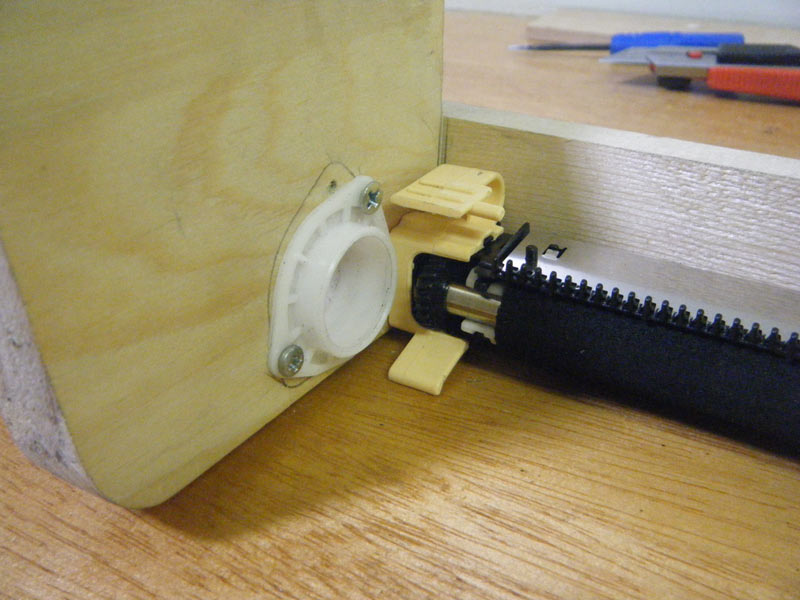
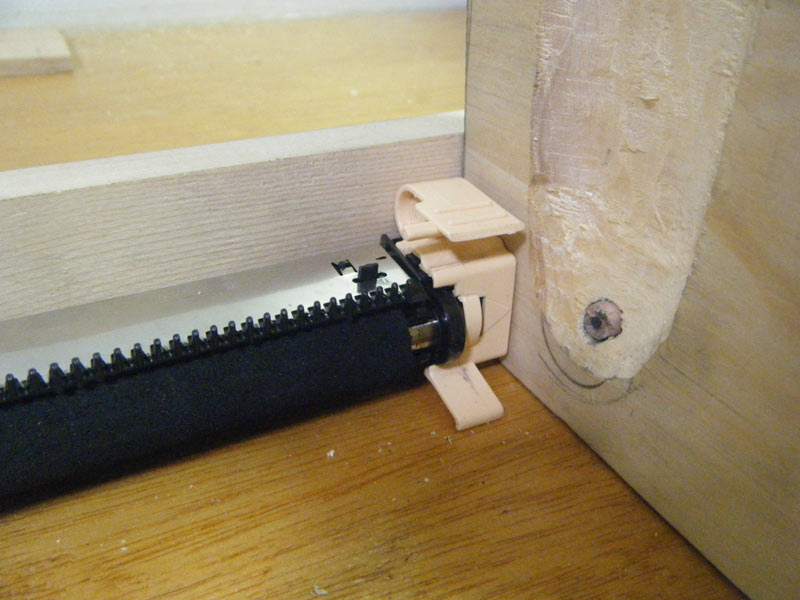
I can't use a similar socket at the other end, because - as we will see in a minute - the blue roller has to be removable. You can see here the 'pin' that will hold it in place:
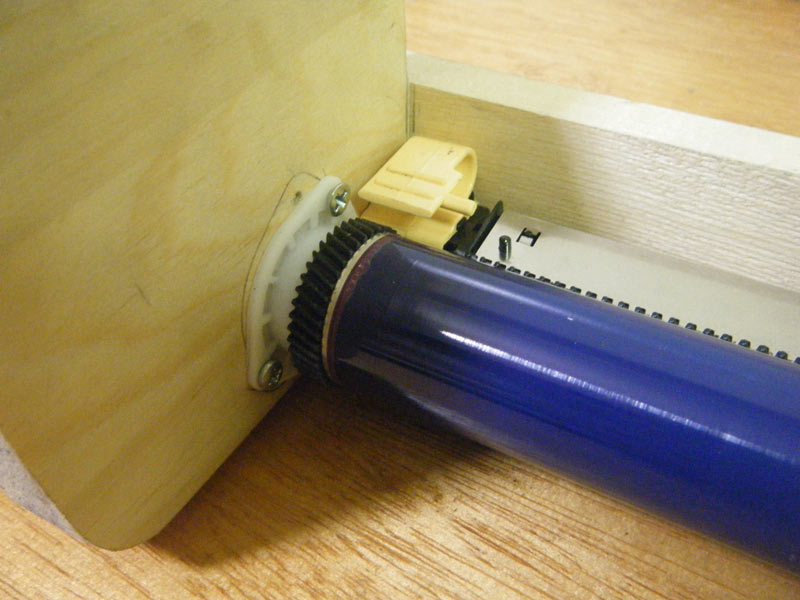
Putting it together ... the blue roller slides smoothly into its socket on the left, and its gear meshes with the one on the sponge roller:
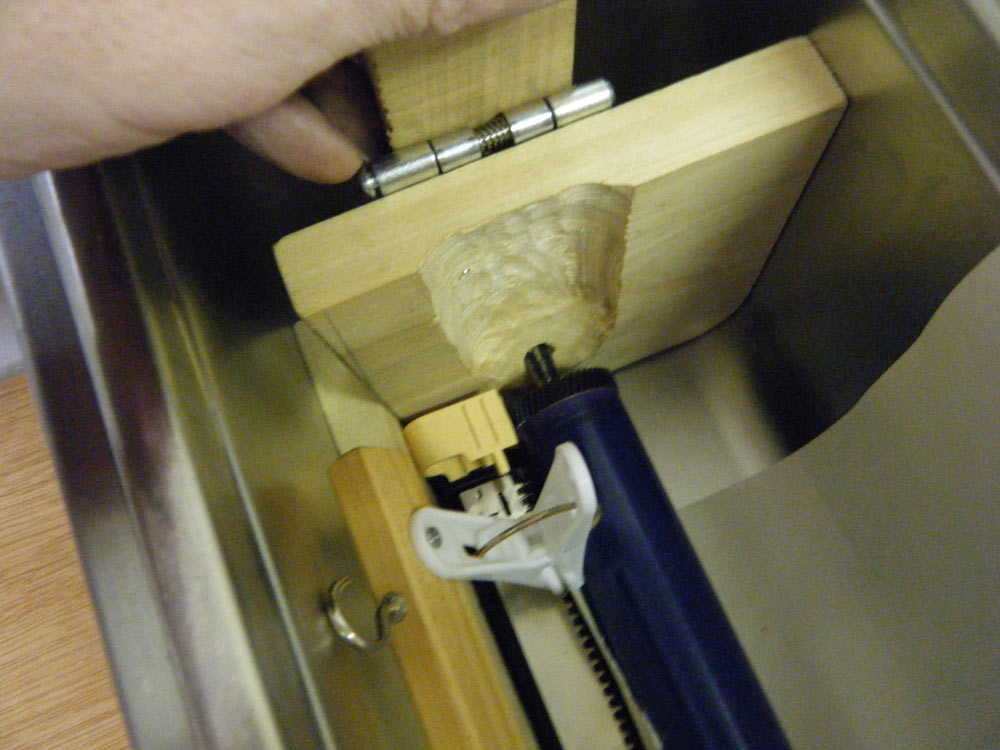
With the other end in position, the wooden pin is advanced to lock it in place:
There is a slot cut into the pin, and this is to allow a metal pin attached to a lever handle to do the opening and closing ...
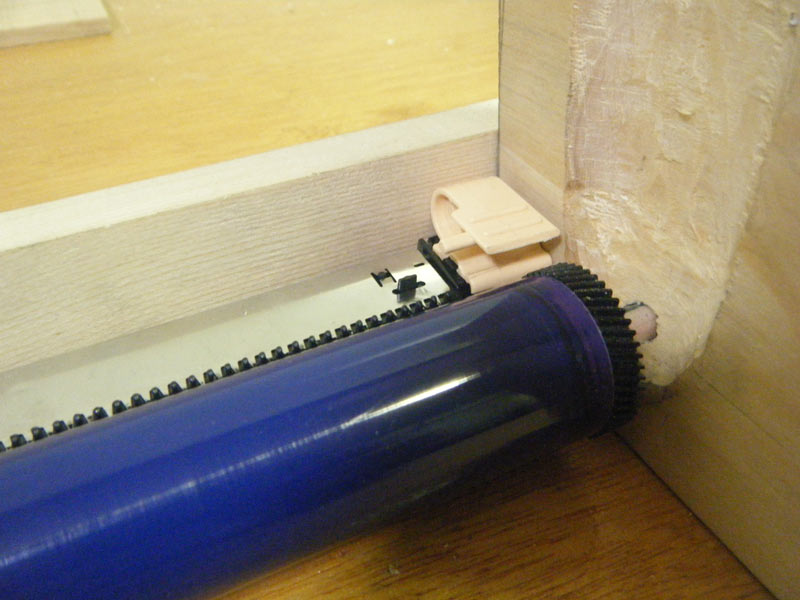
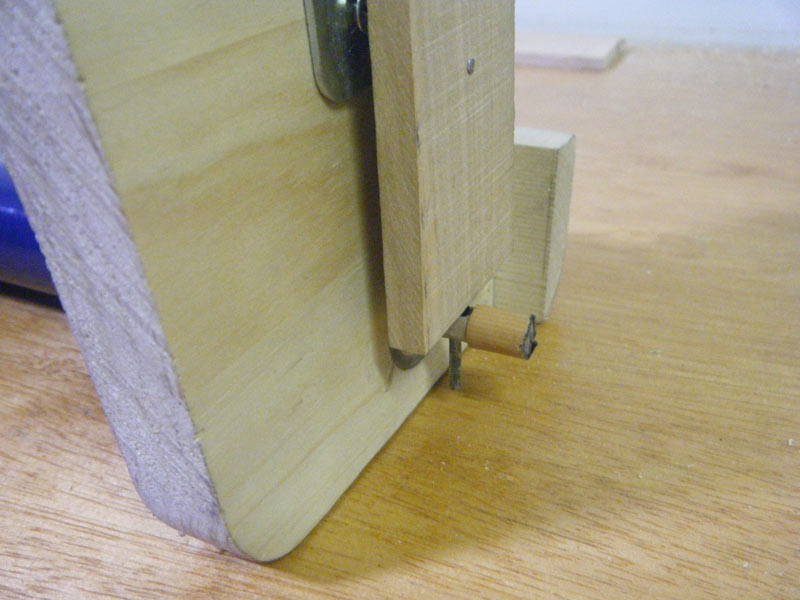
Here is the setup in the 'open' position:
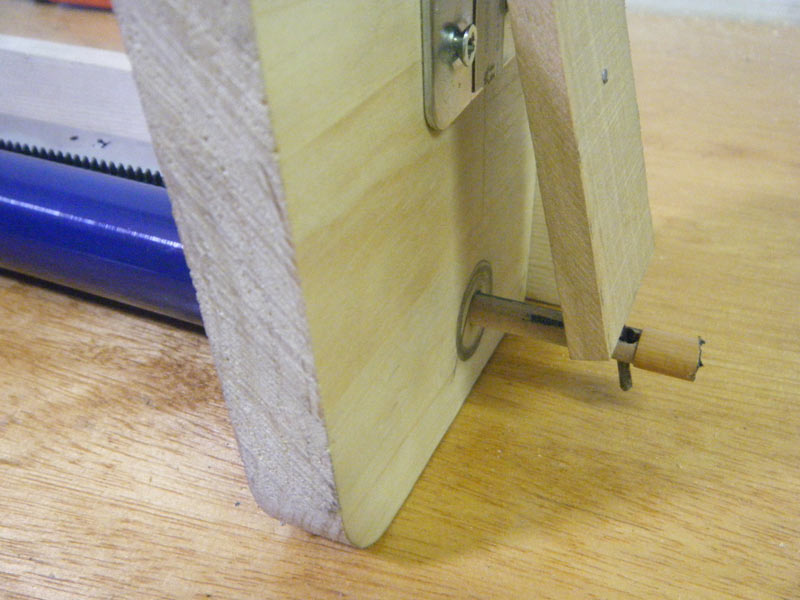
With the lever pushed, the pin advances, holding the blue roller in place:
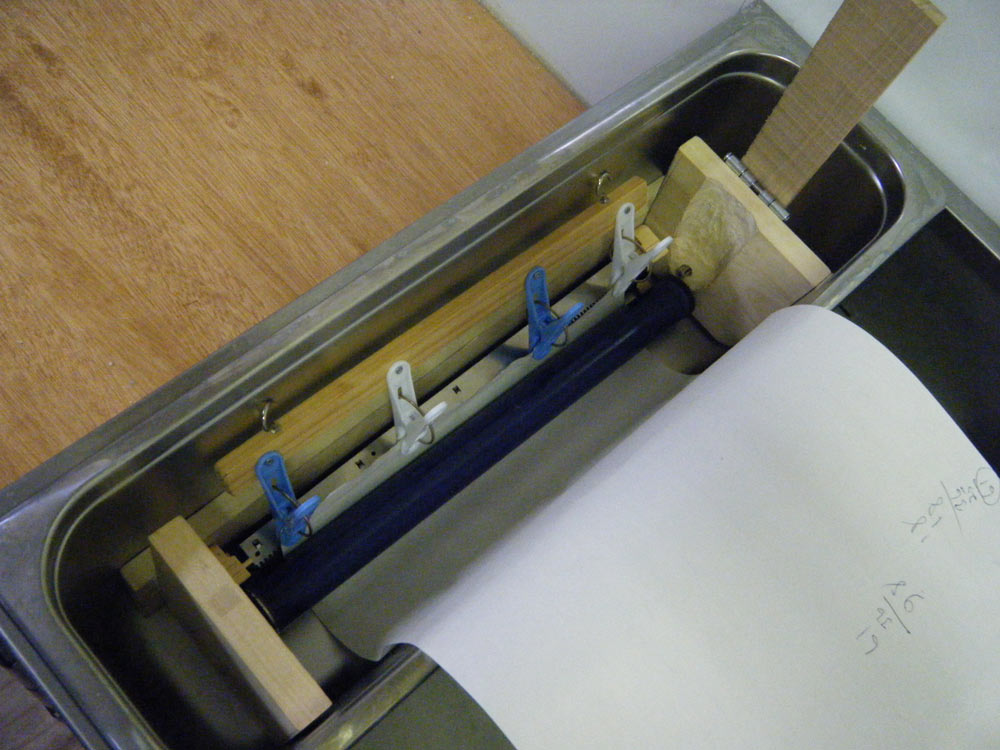
Let's see how this is going to work ...
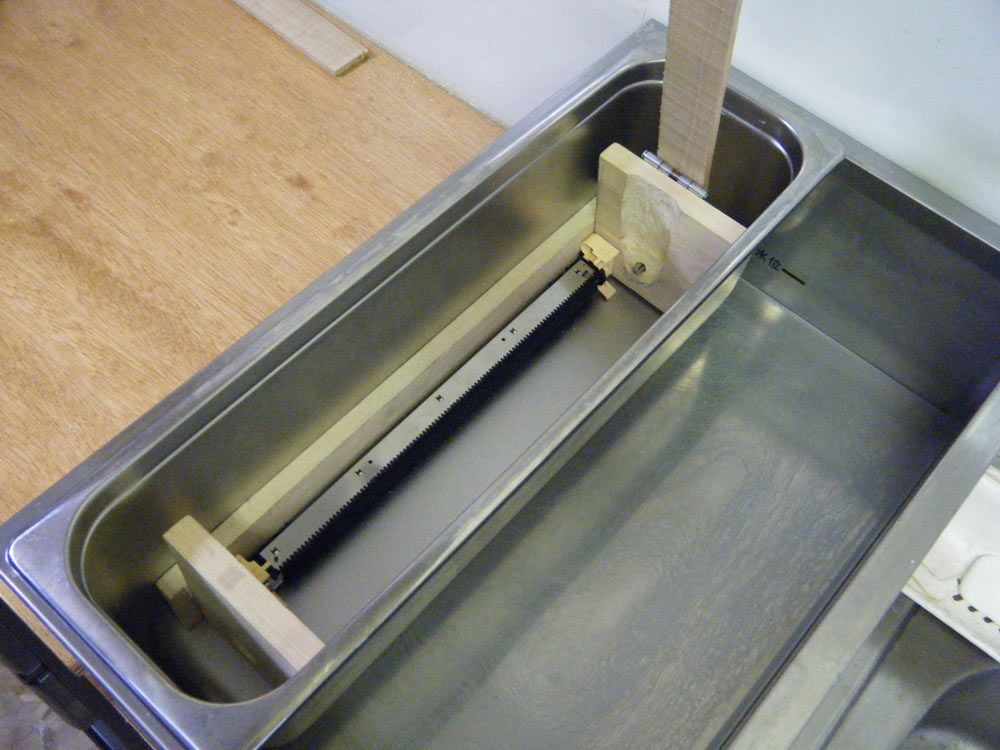
The base unit goes into the sizing tank. Liquid size will be poured in just deep enough to cover about half of the sponge roller.
Each sheet of paper to be sized is held by a carrier (made from a stick of wood with four clothespins):
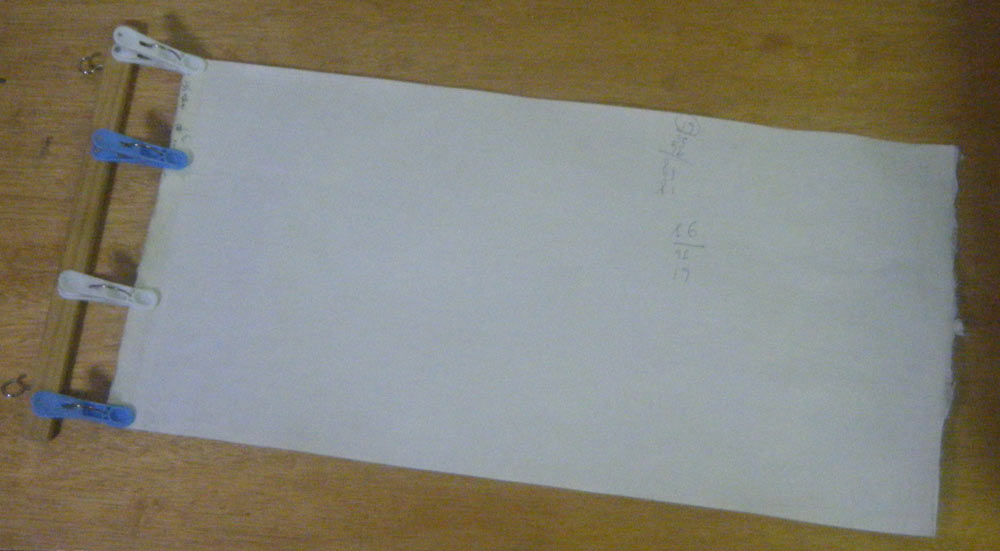
The paper goes in place on top of the sponge roller, with the rest of it dipping down into the liquid:

The blue roller is then placed into its mounting; this will be about half-in, half-out of the liquid ...
The locking pin is then advanced into position with its lever:
With everything ready, 'all' that is left is to pull the paper through the system, keeping a steady movement. The two rollers mesh together, with the smooth blue one (against the front surface of the paper sheet) lightly pressing against the sponge roller on its springs.
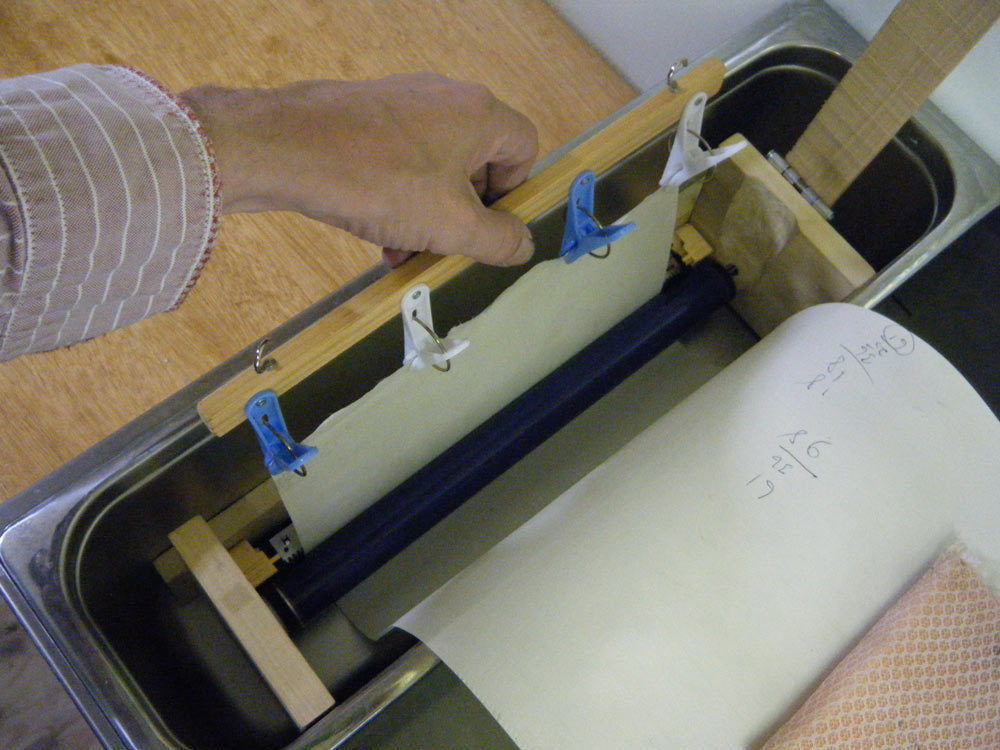
The paper dips down into the size, and passes up between the rollers, where - in theory - it has the excess moisture lightly squeezed out. It is then taken directly to the hanging strings stretched across the ceiling.
The lever is then flipped, the blue roller comes out, and the next sheet is laid into place. Our sizing station has two of these deep trays, so I'll keep the other one also full of warm size, and pour it bit by bit into this one to keep the liquid depth at the correct level as it gets used up sheet by sheet.
So there we have it ... 'Sizing Machine Mark I' is ready for testing! The next couple of days are pretty tightly scheduled (new video coming tomorrow!), so I'm not sure when I can get back to this, but I'll report back as soon as I've had a chance to give it a try!
Added by: Charles on June 8, 2016, 2:34 am
You'll have to get yourself a swiss army knife with all the macgyvering you've been doing recently! Hopefully it works out.

Added by: Jacques on June 8, 2016, 3:06 am
See my comment on your "New woodblocks ..." post of May 27 ...
It would be wonderful if your new invention could turn all that expensive but unusable paper
into printable condition.
Added by: Dave on June 8, 2016, 8:19 am
Jacques, that's of course very much what this is about. If this setup doesn't do the job, then given that all other sizing trials haven't brought this paper to life, then it will be time to open serious negotiations with the papermakers about sending it back ...
Added by: Stu on June 10, 2016, 11:10 am
Be careful ... you may be so successful that you may have to open a "side business" selling sized paper to the other printmakers!
Added by: Dave on June 10, 2016, 12:44 pm
Well, as I vaguely proposed in the 'vision' I put up some years back, having a tool/supplies division would make sense for us ... I have no idea whether or not we could ever reach that stage ...
Added by: Karl on June 15, 2016, 7:41 am
Several years ago you had a shop run an edition that you later rejected. It looked to me from the pics you posted, that paper sizing was one of the problems. I was always curious as to the conclusion of how that issue resolved.
Added by: Dave on June 15, 2016, 8:28 am
The prints were unsaleable, so no payment was either asked, nor made. I did try to make at least a partial payment directly to the young girl who had actually done the job, but this was rejected. I know that she is perfectly capable of doing the work properly, and the lack of quality in the finished job was almost certainly the result of poor communication - her boss simply didn't pass through to her the things that I had specifically mentioned as being important ... She must now be thinking that I'm the biggest jerk in town, but I'm just quietly biding my time. She's very young, and I'm sure that there will be another chance to work together sometime, and I hope to be able to clear the slate at that time ...
Added by: Karl on June 16, 2016, 1:59 pm
Ok, fair resolution with the young lady . Clearly registration was a concern for you from the outset.
But back to the topic of paper sizing, kindly permit me to ask; did the contract shop size that paper? Did they add -ddditional resizing that you know of ? Was that ever an issue that you discussed with the shop director.
Added by: Dave on June 17, 2016, 8:55 am
Neither registration nor sizing was an issue with this job. The blocks were (fairly) new and had perfect registration, and I supplied the paper (very high quality paper, and of course already sized). My discussions with the owner of the workshop revolved almost completely around my requirements for the printing quality, because I knew that if I just left that part unspoken, it would have been sub-standard.
Added by: Jakub on June 27, 2016, 8:31 am
David,
Sounds like the young woman may be another printer your eyeing to steal for your shop.
I also would very much be in line if you ended up selling the sized paper or the new blocks for that matter.
Added by: Jesse Kahn on November 7, 2016, 6:38 am
Interested to hear if this worked out. I need to size several hundred sheets of paper and am poking around for MacGyver-like solutions myself!
Added by: Dave on November 7, 2016, 8:56 am
if this worked out ...
I'll try to make a post about this before too long, but yes, the machine has worked very well. Not only has it been a 'proof of concept', it has now been sizing all our paper for the past few months ..
Lee-san and I are now trying to find time to build Mark II, which will be more stable, easier to use, and capable of handling wider sheets ...
Added by: Jesse Kahn on November 7, 2016, 10:18 am
That's awesome, Dave. I may tinker with something similar over the winter break.
May I ask are you using gelatin or a glue base? If glue, what kind?
Added by: Dave on November 7, 2016, 10:31 am
I'm using a mix of nikawa (Japanese traditional glue) and alum. The nikawa usually around 55gm per litre of water, with the alum being 15% of the nikawa weight.
Added by: Jesse Kahn on November 8, 2016, 3:50 am
Thanks!
Add Your Input