« Remembering traditional woodblock carver Susumu Ito | Front Page | Love child of Bob Ross and Jim Henson ... »
New woodblocks ...
Posted by Dave Bull on May 27, 2016 [Permalink]
In a previous post, I described a trip to a lumberyard in the Shin-Kiba district of Tokyo, and we have now had a chance to move ahead with the wood we found there. They hadn't had free time for it that day, but the other day (by appointment) we went back there again, to work with them on getting the plank re-sawn.
They have an ancient band saw with a carriage that holds the logs in place and moves them past the blade.
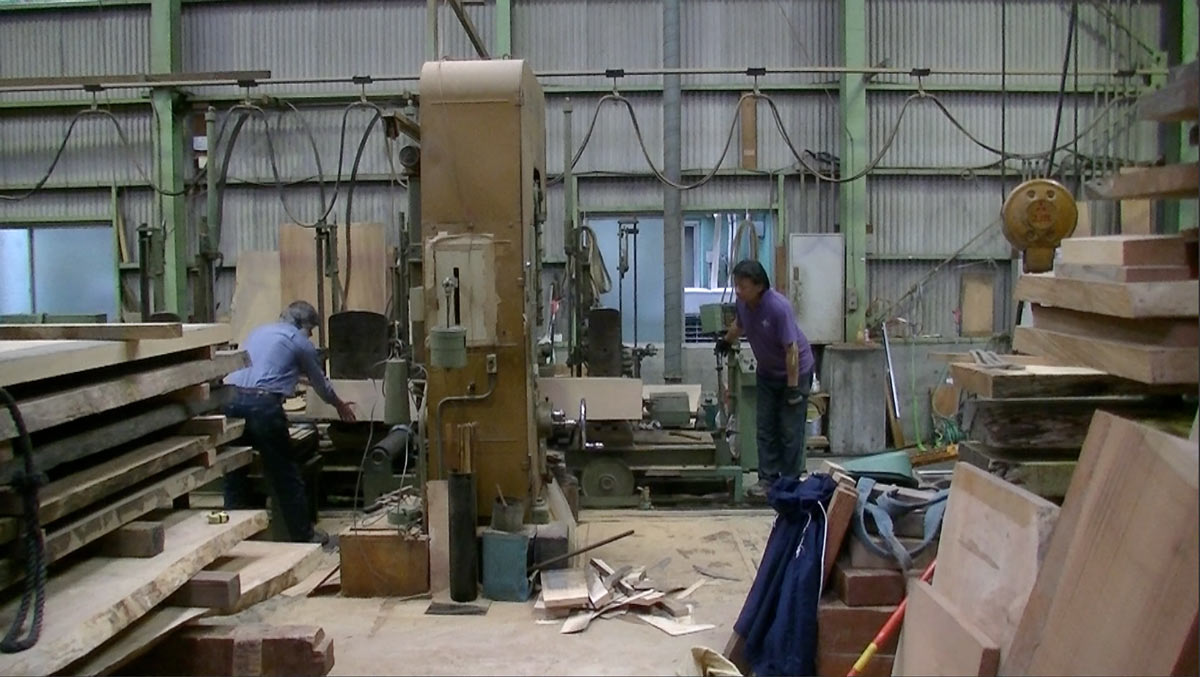
The carriage is guided by a laser system shining down from above, and you can see the green light on the back of his shirt ...
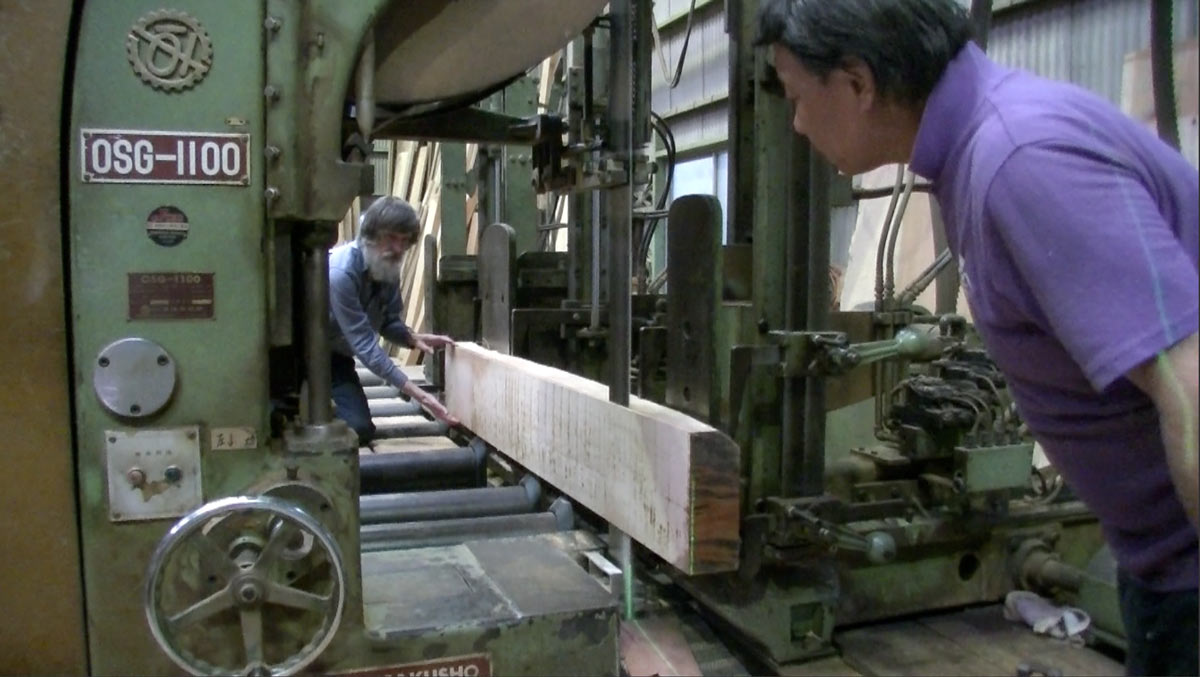
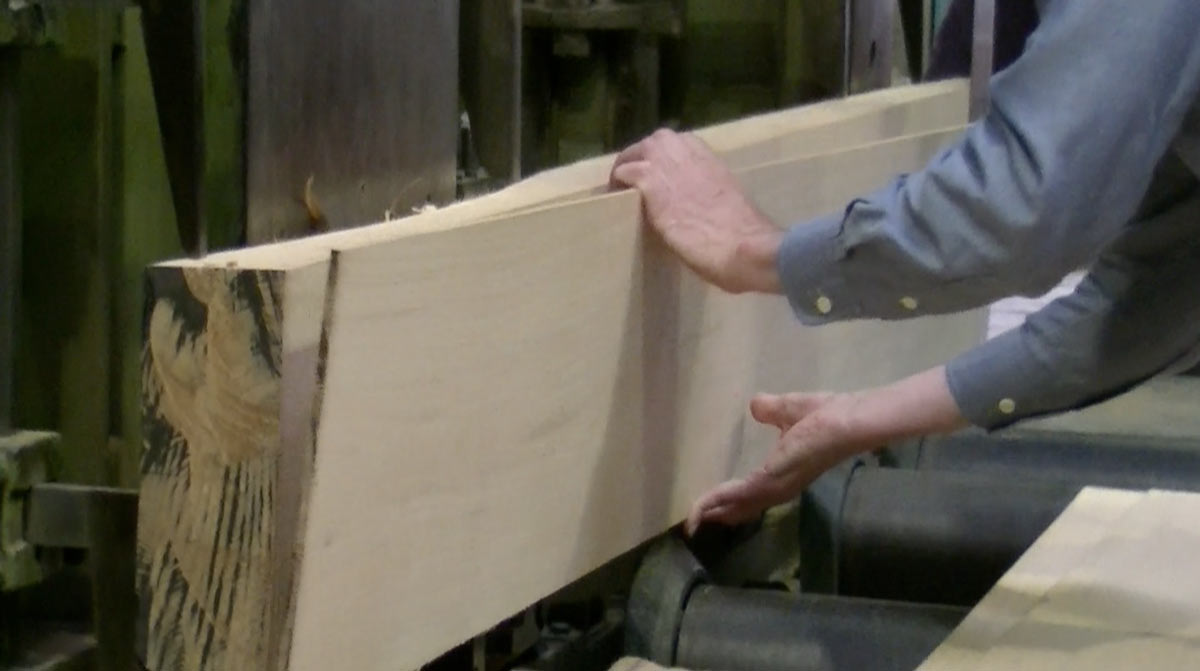
He had prepared a freshly sharpened (and thin) blade for us, in order that we would have as little waste as possible, and this was greatly appreciated. The cuts were quite thin, and the face of each plank as it came off the saw was not too badly gouged up.
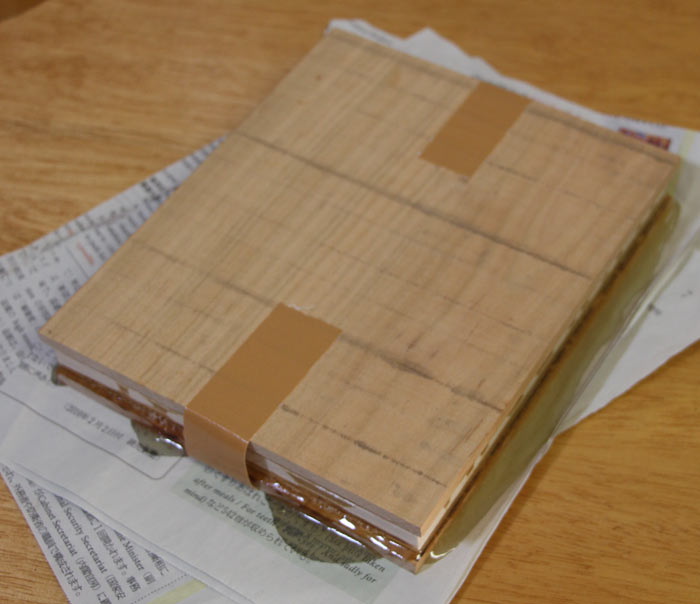
Once we got them home, I tied them up tightly for the final drying:
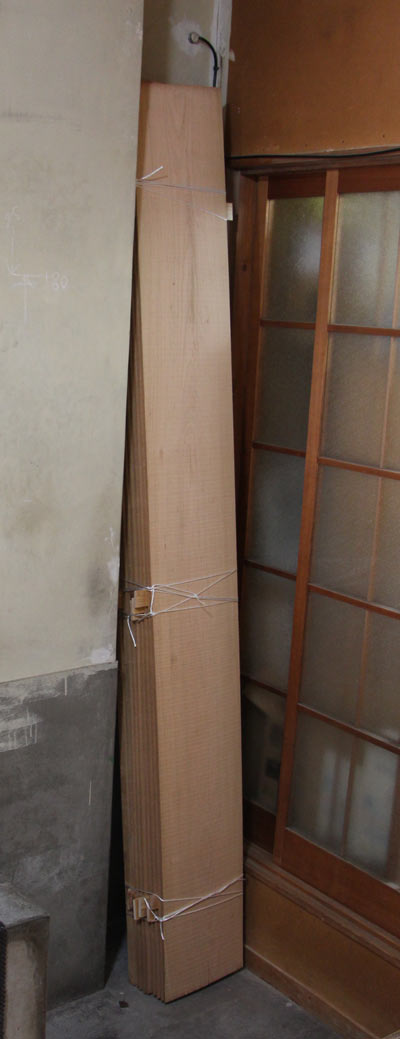
The main plank had been dried quite well, and it didn't take more than a couple of days for these thin boards to dry quite thoroughly. I then grabbed one, and started to lay out a good way to chop it up.
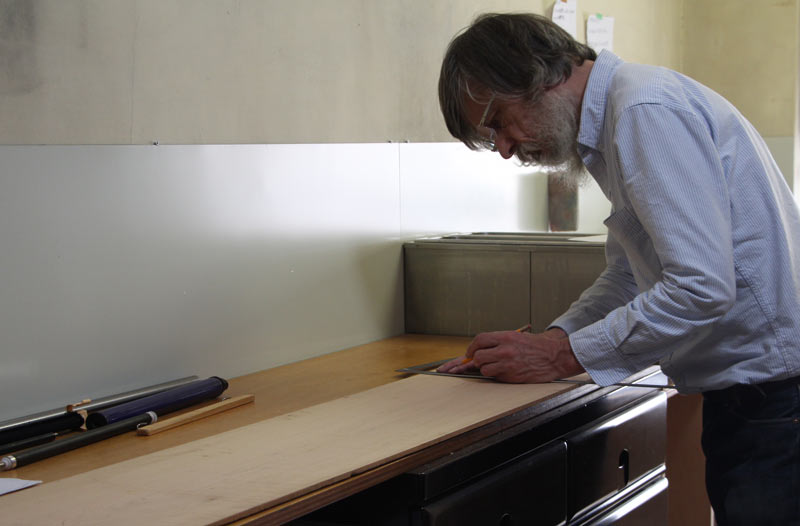
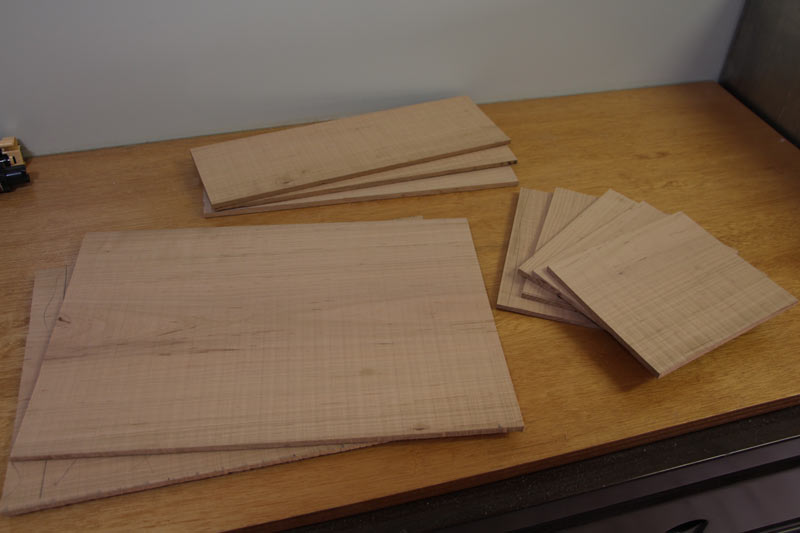
I had to avoid bad places, and tried to maximize the useable area, laying out the standard sizes that we need in our work:
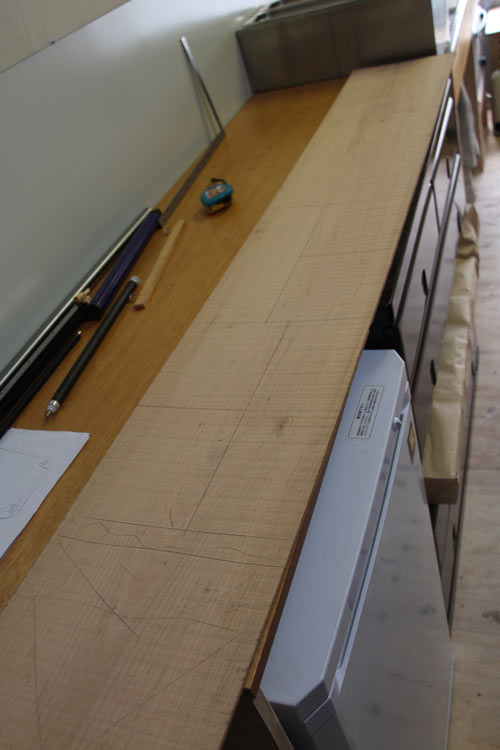
I got ten useable pieces, in three different sizes.
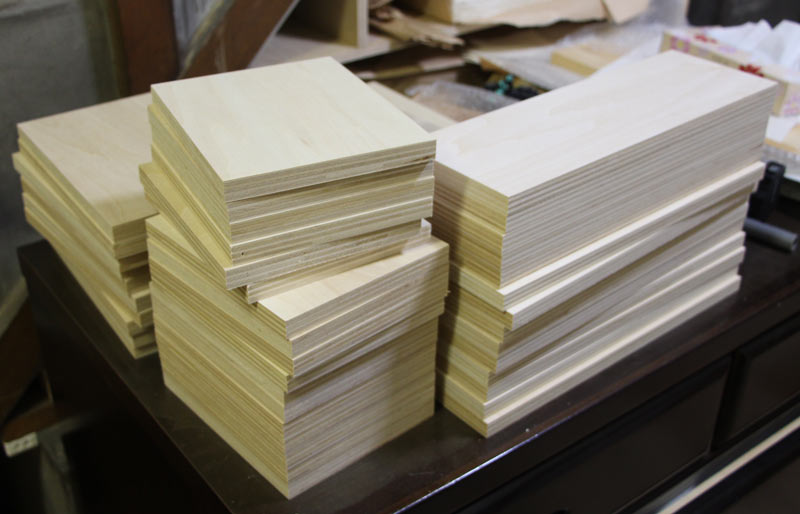
Lee-san had previously ordered up some high-quality shina plywood (precut in the dimensions we need):
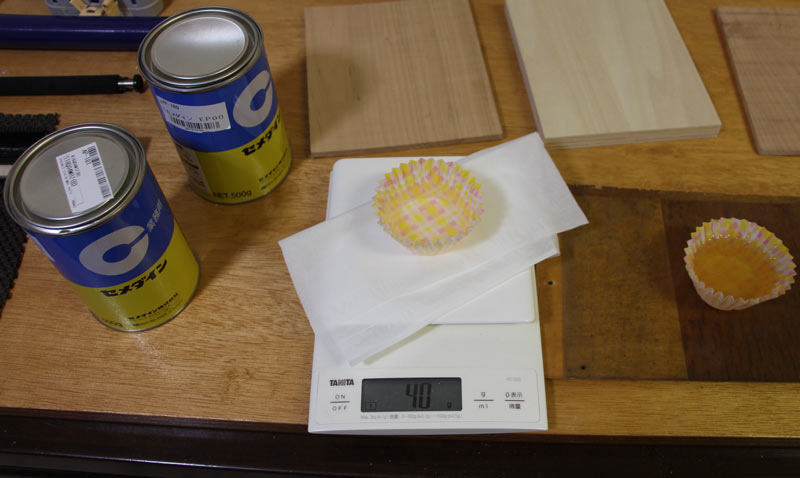
For our initial experiments with this, we're trying a very strong epoxy glue, and here I am measuring it out in equal amounts.
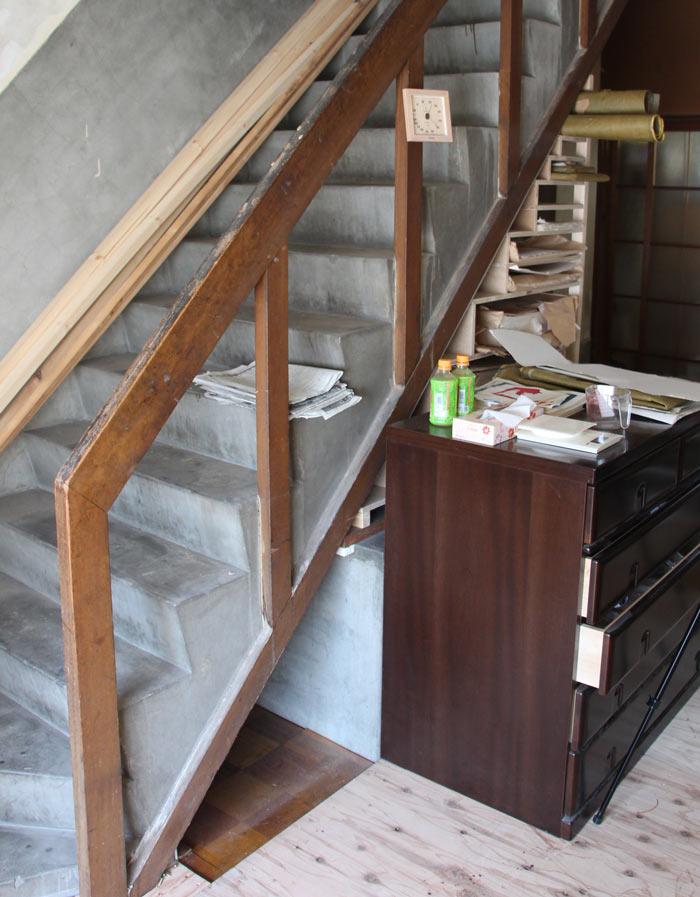
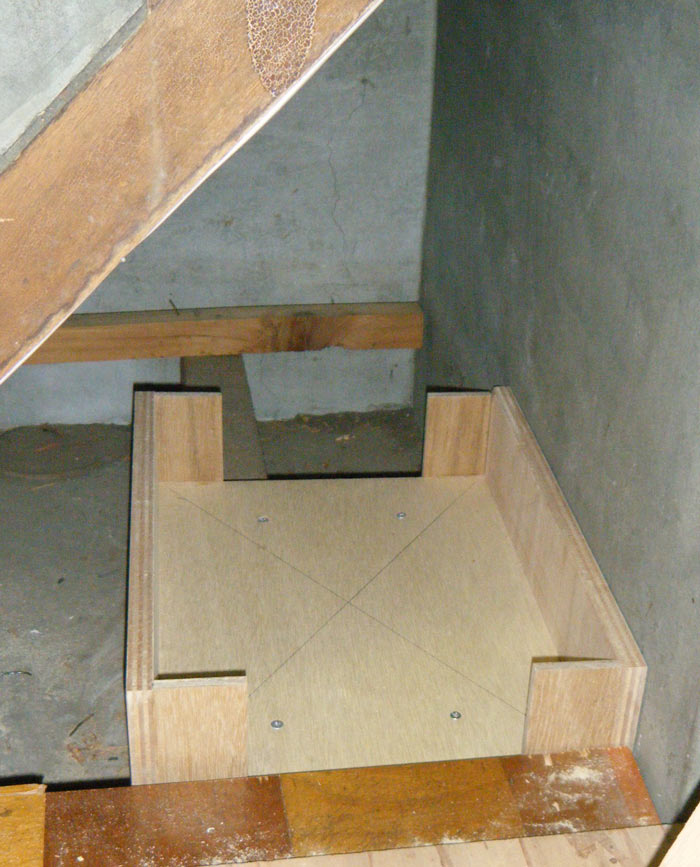
OK, with the sandwich now glued up, how are we going to get it firmly clamped together? A couple of weeks back, I took a look around the 3rd floor of our Asakusa shop, trying to figure out a way to do this, and I noticed this little unused space under the stairs that lead to the roof. Concrete stairs. Hmm ...
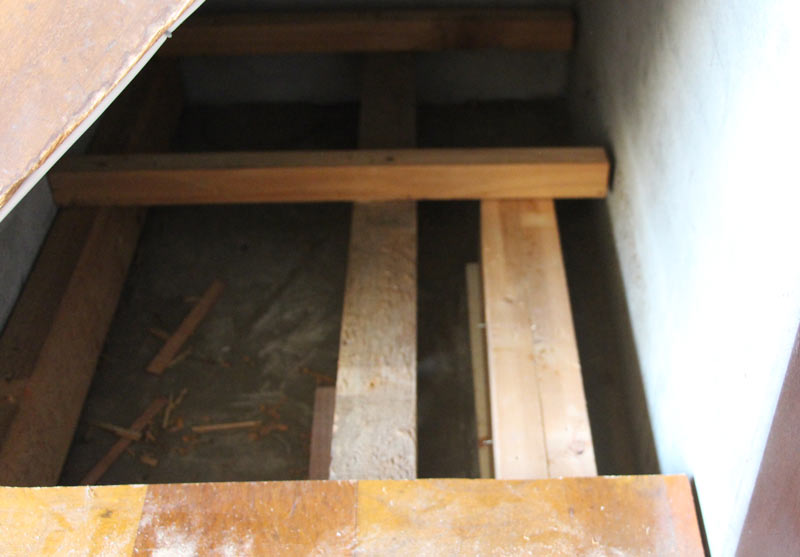
After ripping out the floor in that spot, I found that there was only a single (and not so strong) joist in that space, but a couple of hours work left me with two good strong 'joists' bedded onto the concrete floor. Here will be the base for our 'press':
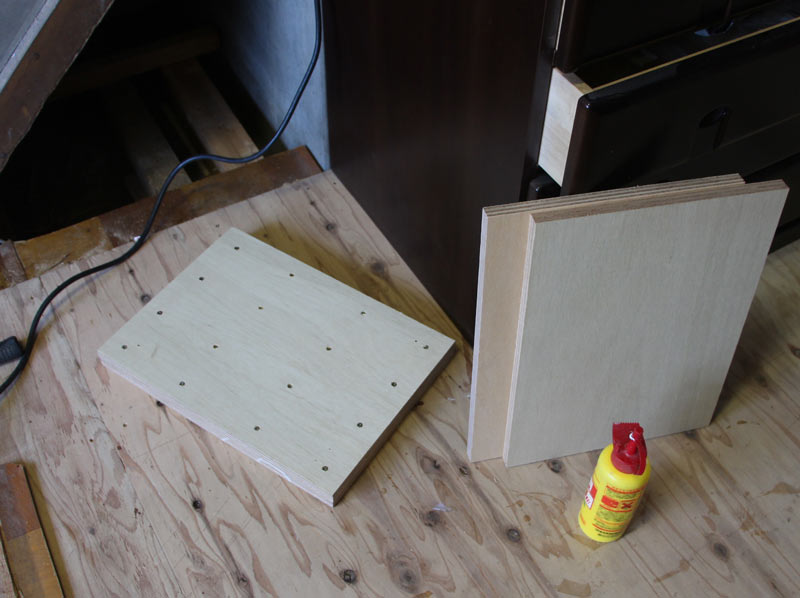
I next prepared two plates - base and top - each one made out of two pieces of 18mm ply bonded and (heavily) screwed together:
To help keep things lined up, I built partial 'walls' around the base plate ...
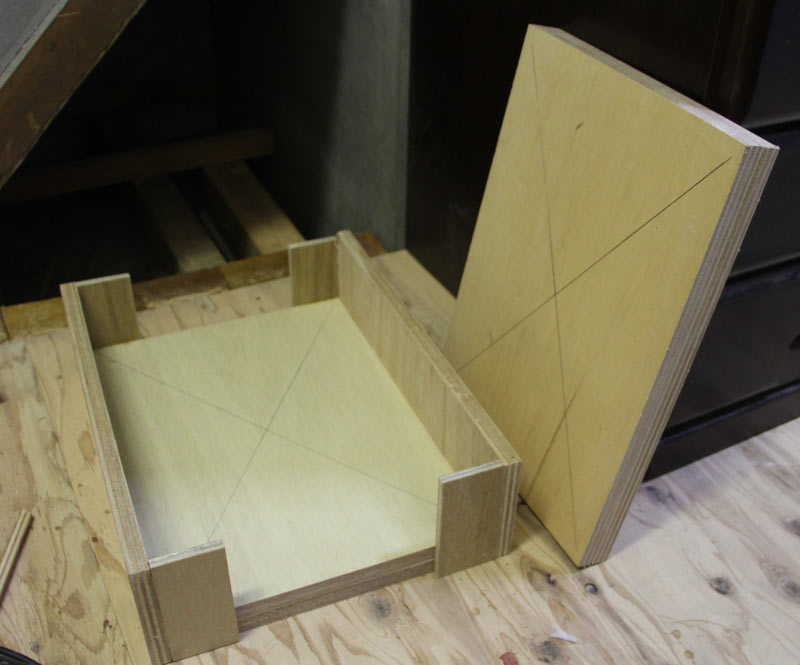
... and then solidly screwed it down onto the joists.
So here we go - the epoxy sandwich goes dead centre over the base plate:
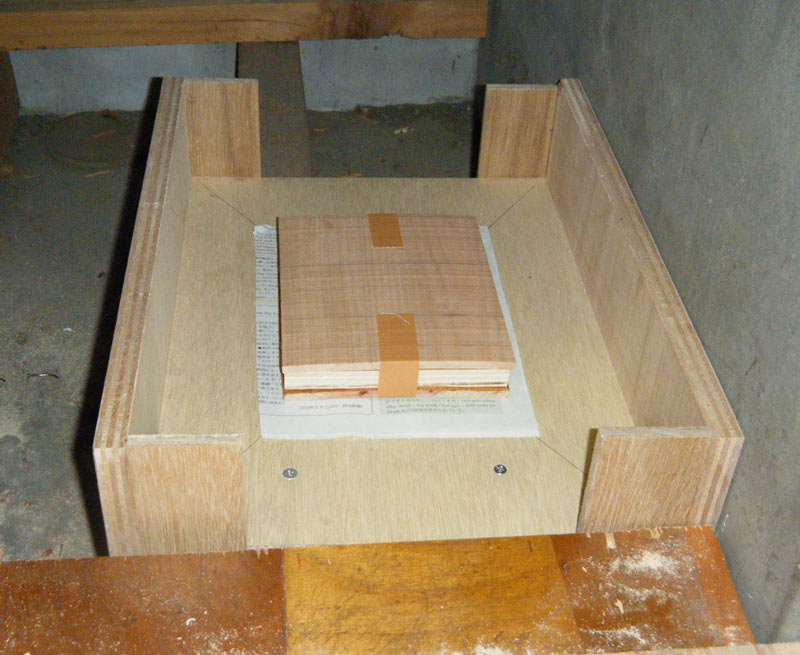
The top plate goes in place:
And you can now see how this is going to work - a 4-ton bottle jack!
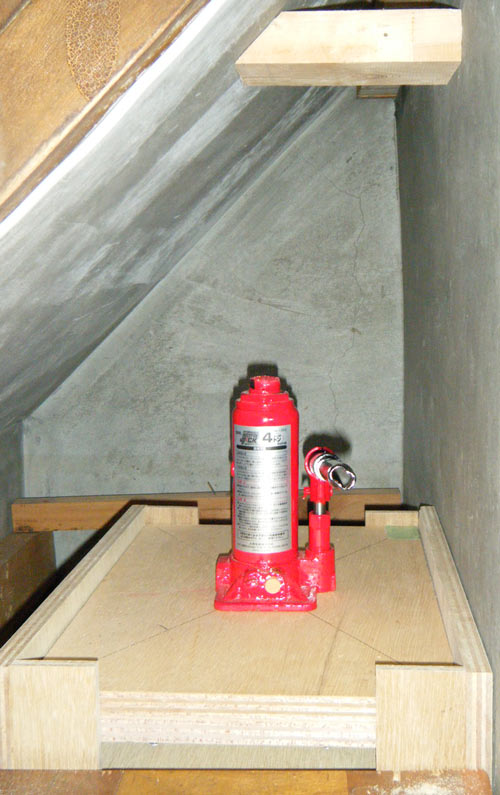
A heavy brace takes the pressure up to the concrete stairs, and a few pumps on the handle force that sandwich flat!
href="https://mokuhankan.com/conversations/images/2016_05/clamping_05.jpg">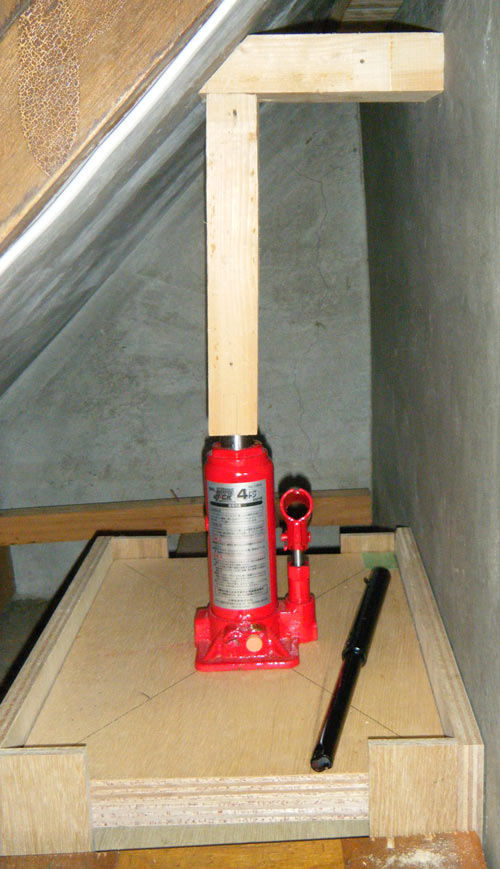
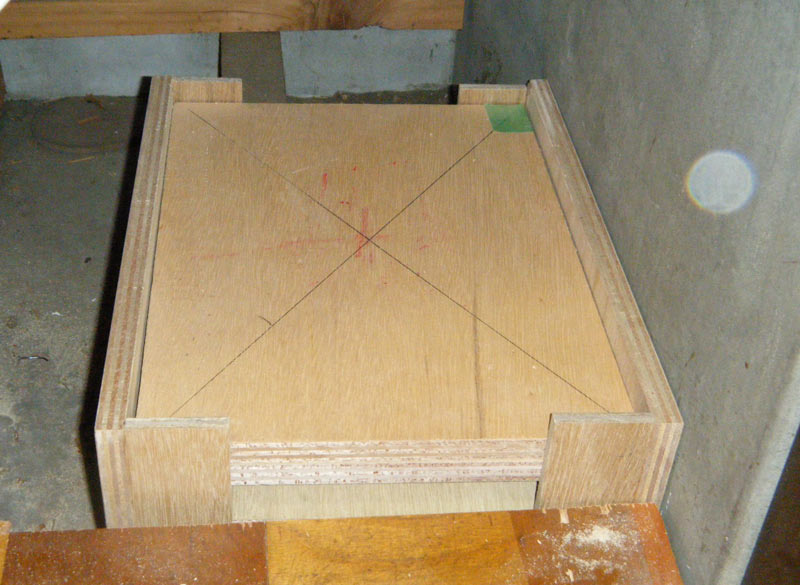
After the epoxy set, and the sandwich came out, I could see that I had clearly used too much glue, as there was a lot of squeeze-out, but a bit of experience will show me how to handle this.
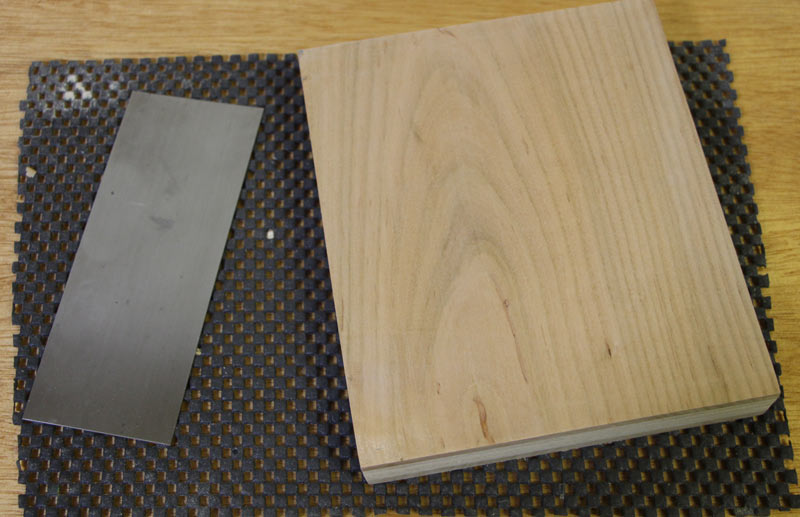
As the band-saw marks were very shallow, it needed only the very slightest pass through a small desk-top planer to leave the surface flat.
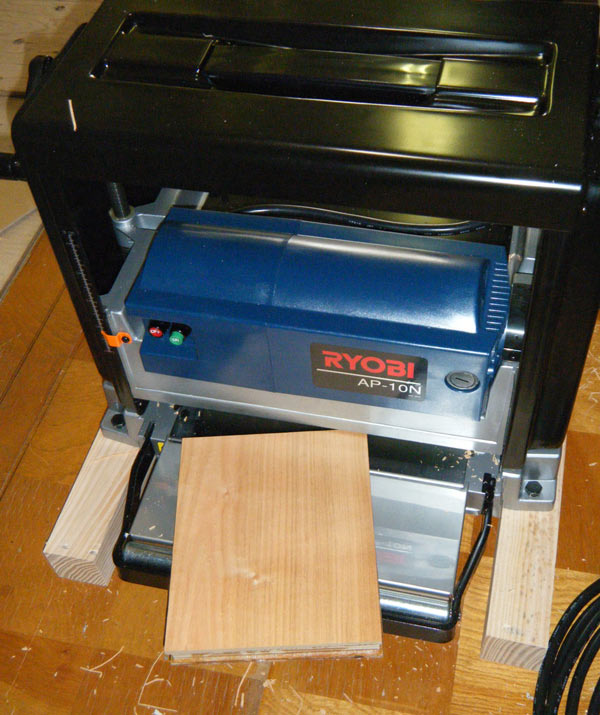
A bit of touch-up with a cabinet scraper left the surface very smooth, and ready for carving.
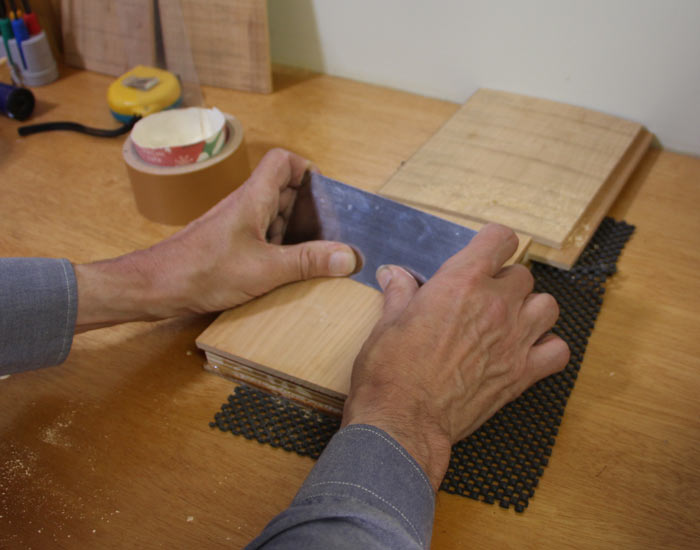
So there we are, our first 'in house' woodblock. I think I'll keep this one untouched (and I also am not perfectly confident about the glue bond just yet), but over the next few days will make some more, and those will go to Kawasaki-san our carver ready for use in the next Ukiyoe Heroes Portraits print!
Added by: Tom on May 27, 2016, 4:49 pm
Fantastic work Dave, not even slightly worried you might destroy the building with the bottle jack? Do you envisage carving through the glue line at all?

Added by: Dave on May 27, 2016, 5:23 pm
destroy the building ...
Wouldn't that be the way to go! Crank ... crank ... Crack! Crack! And down comes the whole building ...
carving through the glue ...
Not going to happen. I asked for the slabs to be 5mm, but he was a bit over that, and even now, with the bonding and planing all done, the cherry layers are almost exactly 5mm thick. There is no way that we would ever carve that deeply. We'll never get down to the plywood ...
Added by: Andrew Stone on May 27, 2016, 9:17 pm
How's the wood look? Do you have an idea even before carving if this is equivalent or already an improvement over what you were getting via W.M.?
Added by: Dave on May 28, 2016, 10:12 am
equivalent ...
Well, it's early days; I've got three done now, and although they are certainly useable - and 'better' than those we have been receiving, they are far from optimal.
On the plus side:
- I've been able to select this wood, both in terms of the larger piece, and at the level of laying out the pieces one by one. No more quarter-sawn!
- it's bonded very strongly; we've had a lot of separation issues with the blocks in recent months, and hopefully that will now be behind us.
On the minus side:
- running small pieces like this through a desk-top planer tends to leave 'entry and exit' ridges on the surface, which are time-consuming to remove. (I'll try and minimise this once we ramp up production by feeding them into the planer in a 'chain').
- the grain patterns are still not optimal. The plank we started with wasn't cut from a large log in the way that we would want (as I described in the previous post), and it's not clear that we will ever be able to source wood sawn that way ...
- this work takes time ... yet something else to eat away at my allotted 24 hours each day ... :-)
Added by: Grahame on May 28, 2016, 6:48 pm
Excellent progress. I hope it comes out well on the carving bench!
Added by: Jacques on May 28, 2016, 11:04 pm
Your dexterity and ingenuity in making things never ceases to amaze me!
Add Your Input