« Dave's Colouring Book! | Front Page | Aspen Grove [1] - Genesis »
Vacuum box ...
Posted by Dave Bull on April 15, 2006 [Permalink]
All the talk about vacuum cleaners around here last week (for the A Story A Week) got me pushed to get on with a project that has been hanging around for a couple of years - building a proper set-up for photographing the prints.
For the past few years - since starting the Surimono Albums - I've been using a scanner to produce images for the website, and it hasn't been bad, but there is one major problem with it - because the light source moves across the face of the print together with the scanning lens, it scans them 'flat', and a lot of the feeling of a real print is lost.
But photography too is difficult. The standard method is to use a stand for the camera, pointing downward to the print, which is illuminated with a couple of lights shining down from each side. But this too, produces a very flat image, as the multiple sources of light dispel any shadows.
So ... for a long time I've been thinking about a different way to do it, and this weekend, with a day or so in hand before getting the paper wet for printing the next issue in the Small Print Collection, I tried it.
Here are a few photos of the setup, and then we'll see how it turned out. (Images all popup into another window ...)
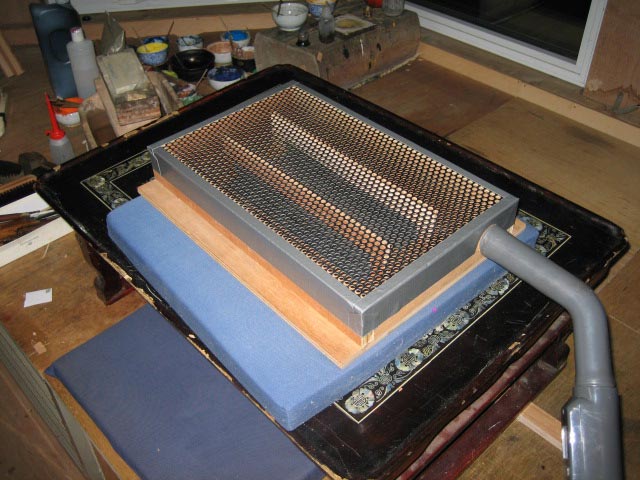
There's the basic box; it's just a wooden frame on a plywood base, with a piece of perforated metal plate on the top. There is a small plastic tube sticking out one side, to which my vacuum cleaner attaches. (This is MARK II, and you can perhaps see that under the metal, there are a couple of wooden strips supporting the top surface. Air pressure is strong!)
For use, I wrap it in a medium-grey T-shirt, place a print on top, and fire up the vacuum cleaner. The shirt saves me the trouble of cutting a mask that matches each different print. The vacuum cleaner is plenty powerful enough to pull the print down even through the shirt. And having the shirt there (in a neutral colour) also avoids having the metal pattern show through the print (I did say this was MARK II ... :-)
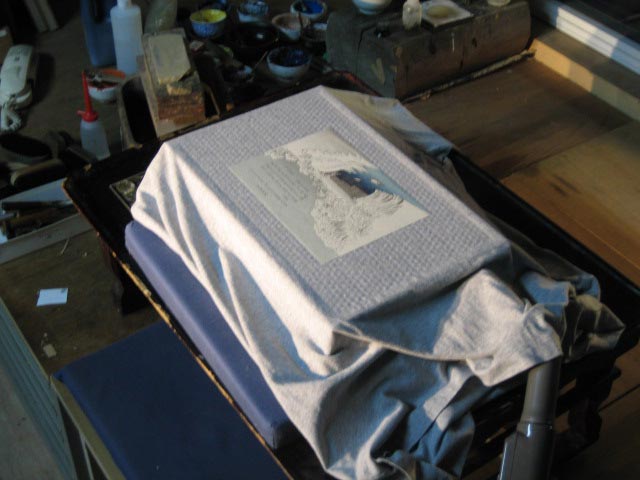
The whole thing sits on the platform where I usually sit to carve or print (the camera - not visible in this photo - is clamped to a bracket on the overhang, and is pointing straight down):

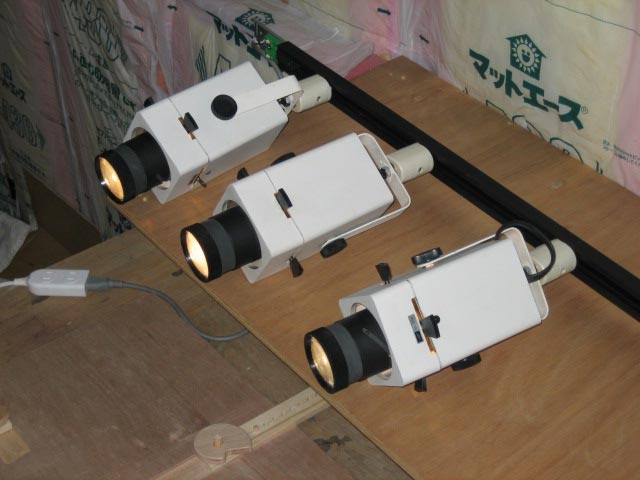
In those two previous photos you can see light shining onto the setup. It's coming from across the room, where there is a battery of three small spotlights. I got these from an internet auction a couple of years ago (with this purpose in mind) and they have been quietly waiting their turn ever since:
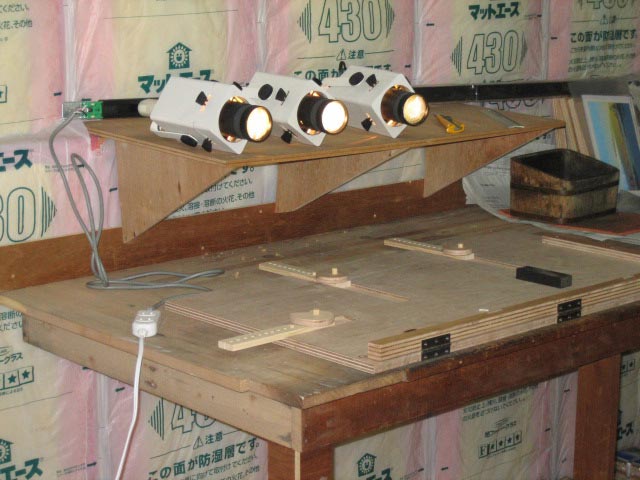
They are actually sitting on the paper shelf I built for this year's scroll project. The lights are positioned that far away - right across the room - to ensure an even illumination across the entire surface of the paper. If the light source were too close, the top end of the print would bright, and the lower end would be visibly darker. But with lights this far away, I can't detect any difference in light levels across the image area, even with just a blank white sheet in place.
So, how did it turn out? Mixed. At first, I had the angle of the lights just too low, too raking, and the print looked like a bizarre jumble of mountains and valleys. But after raising the attack angle of the spotlights, and also adding a small 'counter-balancing' light coming from the opposite direction, at the bottom of the print, the prints look very nice indeed ... very realistic.
I say 'mixed' because although the set-up is working pretty well, it seems that my 5 MegaPixel camera, although fine for general photography, just doesn't have enough resolution to serve for high-quality offset printing (for published collections of my work). And what makes it worse is that the camera doesn't have a RAW mode for saving the data, so the images have horrible jpeg compression.
But not to be negative; this set-up will do very well for catching good images for the website, and then later, when I can arrange a higher-quality camera, it might just do the job for the publishing requirements.
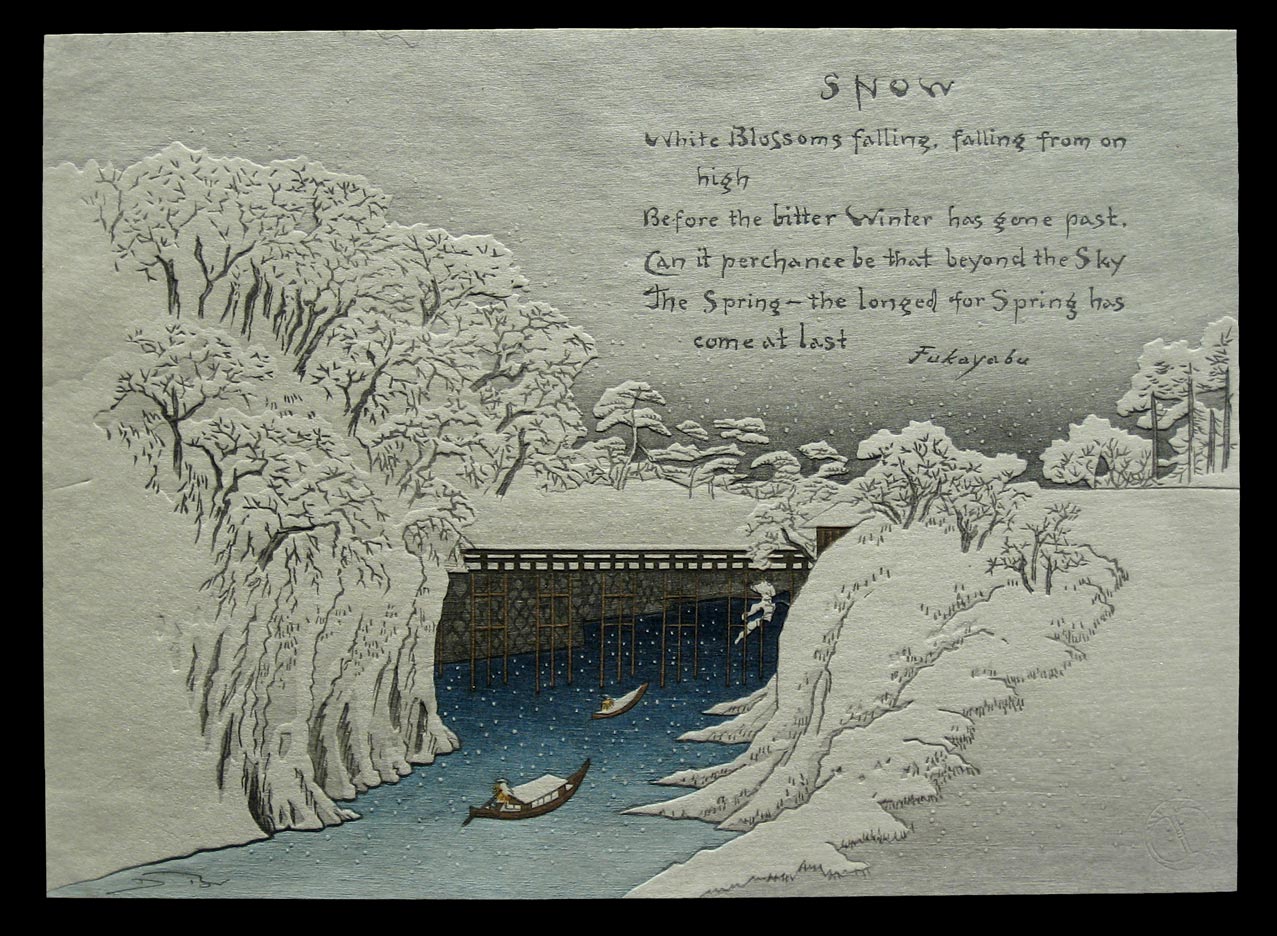
Here are a couple of samples - two prints from my Surimono Albums (click to view popup versions shown at 50% of the data that my camera captures). The first one - with lots of white areas - shows the bad jpeg compression artifacts the worst, although at this 50% reduction, they are managable.
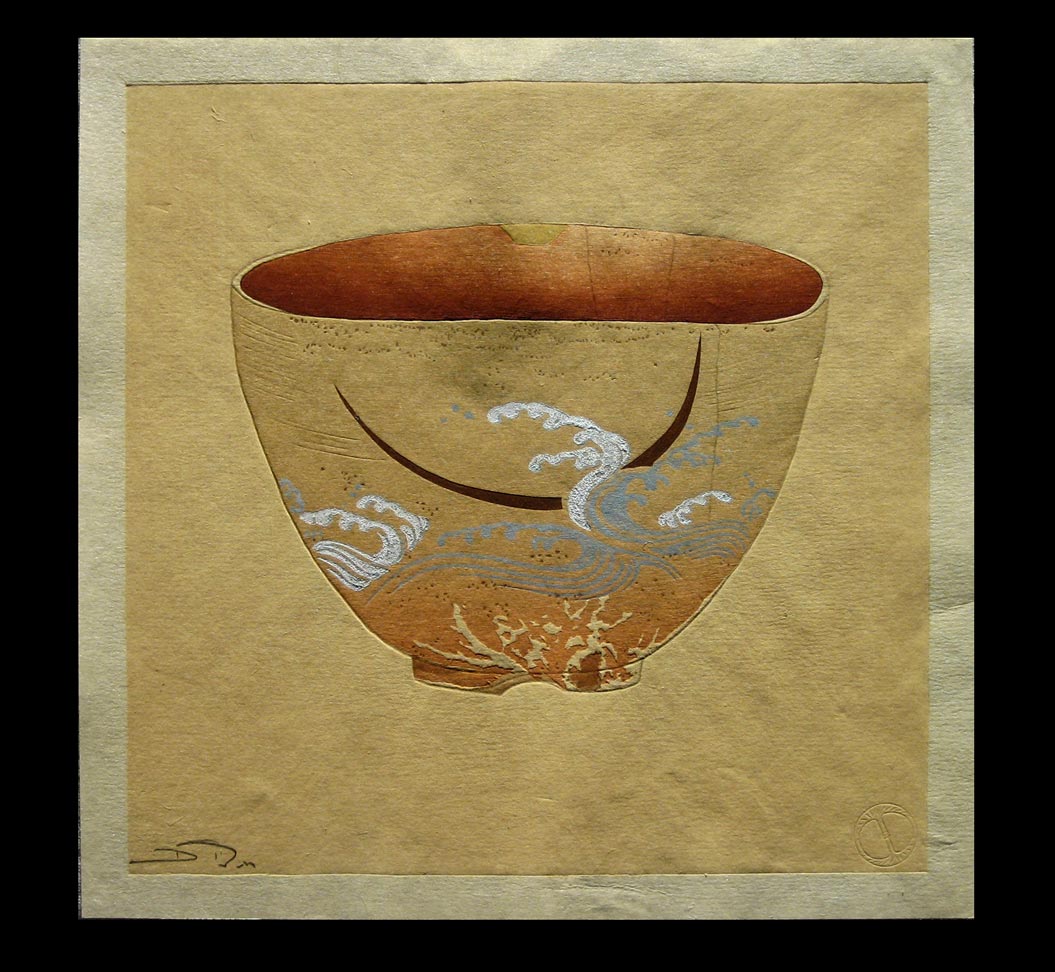
The vacuum is pulling most of the prints down very neat and flat, but this next one shows that even a strong vacuum (I cranked it right up) can't solve the problem of paper distortion when the entire sheet has been twisted out of shape by too much overprinting on thin paper. But this style of image looks much better, as the jpeg compression is less bothersome.
Take a look at the popups - they look good enough to eat! But now I'm having a few second thoughts about this; if I put photos like this on the website, and people order them based on those images, then what will they think when they open the package in a modern room full of bright fluorescent lights shining from every direction? "Eh, this looks nothing like the advertisement! I was robbed!"
Added by: Gary on April 15, 2006, 11:37 pm
You worry too much. Relax. No one is ever going to have the same lighting conditions in their home as you have in your studio, and no one is ever going to see it the same way you do. Scam? No way. Just go into production making lighted displays that bring out those features and sell them _with_ the prints. :)

Added by: Julio Rodriguez on April 16, 2006, 11:49 am
I can't tell for sure but it looks like the lights are aimed almost straight ahead...is there
any angle at all toward the paper or are they aimed at the far wall or what ? How far are the lights from the vacuum setup ?
Images look fantastic, really shows off the embossing well.
Added by: Dave on April 16, 2006, 12:08 pm
The three spotlights are at about chest height, and the vacuum box is around a foot lower than that. With a three metre distance between them, it's still a pretty low angle, maybe around 15~20 degrees?
I found that lifting up the back end of the table on which the vacuum box is sitting is the easiest way to adjust the light attack angle for each print, case by case, to get the best effect without overdoing the three-dimensional feeling. (In the third photo at the top you can see the little wooden bar that I used for this ...)
Add Your Input